Tool opens NES, SNES, N64, and some original Gameboy games (cartridges) and more for easy access for cleaning and repair. This new slimmer version is easier to use in narrow screw wells and is a higher quality metal that does not round out like some others.
$4.99 + Shipping
www.nintendorepairshop.com
Tuesday, 3 April 2012
Dr.Mario NES 8
I thought Tetris was my favorite puzzle game But I guess not ? My mom had this game and I didn't like it as a kid. Things sure have changed ! It is a very
competitive game and has a 2 player Vs mode :) The music is great and kinnda Mario sounding. This is deff a top pick for me !
Graphics:6
Sound:8.5
Gameplay:8.5
Replay Value/Game Length:8.5
Vs/Final:8.5
Overall:8
competitive game and has a 2 player Vs mode :) The music is great and kinnda Mario sounding. This is deff a top pick for me !
Graphics:6
Sound:8.5
Gameplay:8.5
Replay Value/Game Length:8.5
Vs/Final:8.5
Overall:8
How To....Clean NES Games
Let's say you are feeling nostalgic. You go to your closet and pull out that old NES and hook it all up. You put in the game and turn on the system, but it doesn't work. You try everything from banging on the side to trying a different game. Still, nothing works. Read through this article and you will learn how to play that old NES.
1-Pour a small amount of window cleaner into a small cup.
2-Dip the Q-Tip into the window cleaner that you poured in step 1. Be sure to only dip one side of the Q-Tip into the window cleaner.
3-On the bottom of the NES game are metal contacts. Rub the side of the Q-Tip with the window cleaner on these contacts. Make sure you rub both sides of the contacts.
4-Now use the other side of the Q-Tip (that should be dry) exactly the same as step 3, but without window cleaner. This dries off the contacts. If you have a one sided Q-Tip just use another Q-Tip.
5-Dispose of the Q-Tip. You can use the extra window cleaner in the cup for another game, but make sure you use a new Q-Tip.
6-Your NES game should now work, so put the game into your NES and play. Enjoy!
Another method is, using a white eraser.Open your game and u can clean the dirt right off the contacts.
Opening your game is a lil bit more difficult :( U can get the right tool to get Nintendo screws out of your games here.www.nintendorepairshop.com
Or there are other way I found on the net but aren't really recommended ! Want your games to last another 25 years ? Buy the tool !
1-Pour a small amount of window cleaner into a small cup.
2-Dip the Q-Tip into the window cleaner that you poured in step 1. Be sure to only dip one side of the Q-Tip into the window cleaner.
3-On the bottom of the NES game are metal contacts. Rub the side of the Q-Tip with the window cleaner on these contacts. Make sure you rub both sides of the contacts.
4-Now use the other side of the Q-Tip (that should be dry) exactly the same as step 3, but without window cleaner. This dries off the contacts. If you have a one sided Q-Tip just use another Q-Tip.
5-Dispose of the Q-Tip. You can use the extra window cleaner in the cup for another game, but make sure you use a new Q-Tip.
6-Your NES game should now work, so put the game into your NES and play. Enjoy!
Another method is, using a white eraser.Open your game and u can clean the dirt right off the contacts.
Opening your game is a lil bit more difficult :( U can get the right tool to get Nintendo screws out of your games here.www.nintendorepairshop.com
Or there are other way I found on the net but aren't really recommended ! Want your games to last another 25 years ? Buy the tool !
Official Nintendo System Dust Cover
This black vinyl coated cloth-like dust cover for the NES console with cutouts for where the cords come out. It is Nintendo brand with the logo on it in white. With this cover keep the dust from getting in the vents on top which get disgusting while preventing the yellowing of the upper plastic case from exposure to UV rays. A great way to protect and keep your Nintendo functional and nice looking for the long run!
Fix your NES, once and for all !
The toaster NES is the ideal system for playing NES games. For many years, unlicensed/pirate clones of the Famicom and NES have been made, and only recently have they caught on as a means of "replacing" your broken NES. A much better solution is to fix your broken NES. The end result is much nicer, trust me. Everyone of your NES games will work, with perfect audio and video. No game incompatibilties, no off tune sounds, no off colors, no missing sounds, and no messed up glitches. Just pure NES fun as you remember it back it in the 80s and early 90s. Every game cart will boot the first time you insert it into the system and power it on!
Below is the method that I use to fix my toaster NES systems. Yes, I have several. People tend to part with their toaster NES systems because they think they are broken, when all they need is some maintenance after 20 years of service. Anyway, this method is sure to make your NES as good as it was when you first got it new back in the 1980s. It takes time and patience, but if done right, you should only have to do this once every 5 to 10 years.
A few notes on the supplies that I use. First note that I do not use a replacement 72-pin connector. The unlicensed, non-Nintendo 72-pin connector replacement parts are known to be of poor quality and they are extremely tight, making game cart insertion and removal difficult. They also tend to break easily. The original 72-pin connector is the ideal choice, assuming it has been restored, which is what my method aims at: return your official connector to the perfect working condition that it was originally in when your NES was new.
The three main ingredients that I use are...
1. WD40: found in any hardware store in a spray can
2. 99% pure anhydrous isopropyl alcohol: can be ordered off of the web, it is rubbing alcohol without any water in it. It is cheap, so it is worth going through the trouble to buy a larger bottle, which should last a life time, for game maintenance at least.
3. Stabilant 22: can be ordered off of the web. It is expensive, but it is the magic ingredient for AV electronics. It is a contact enhancer used in computers, AV equipment, and even automobiles. It prevents contacts from corroding, and it also improves the electrical connection. Some people call it liquid solder.
Now for the steps on fixing your NES. Please use Google to search for details on the specifics of some of these steps, such as disabling the lockout chip, disassembling the NES, and bending the pins of the 72-pin connector.
0. Disassemble your NES and use a can of compressed air to blow the dust off of everything, and use warm water, hand dish washing soap, and a sponge to hand wash the plastic outer shell of the system. Be very careful with the stickers on the bottom half. If it isn't dirty, you can skip this. I typically just wash the top half, which tends to get real dirty. Use your kitchen sink's spray hose gun to jet rinse everything. Then towel it dry.
1. Disable the lockout chip.
2. Place the 72-pin connector in a bowl filled with WD40. One full can of WD40 should be enough. Make sure that the entire 72-pin connector is covered. Let it soak for 24 hours.
3. Meanwhile, use dampen a white paper towel with WD40 and wipe down the two metal shielding pieces, as well as the metal parts of the AV and power module on the NES mother board. Wipe in the WD40 and repeat over and over again until the components are clean and shiney. Never use too much WD40, as you don't want to get any of it on the circuit board parts. Use a clean, dry paper towel to wipe off all excess WD40 from the components you just treated. Use another paper towel, this time dampened in 99% pure anhydrous isopropyl alcohol to wipe clean the metal parts. Use enough alcohol and enough paper towels until the metal components are no longer greasy.
4. Use another paperl towel soaked in 99% pure anhydrous isopropyl alcohol and wipe the contacts on the mother board that connect to the 72-pin connector. Do NOT use WD40 on the mother board or its contacts. Repeat cleaning the contacts until no more grime comes off. You can also use q-tips dipped in the alcohol to brush clean the contacts.
5. Once the 72-pin connector is done soaking, remove it from the bowl and dry it off using paper towels. Next, pour the pure alcohol over the 72-pin connector and then dry with paper towels, repeating until all WD40 residue is removed.
6. Cover an old credit card with a layer of paper towel, trimmed to fit nicely, and moisten the paper towel with pure alcohol. Then insert it into the 72-pin connector as if it were a game cart. Repeat multiple times for both ends of the connector, until the pins are nice and clean. Use a bright light to see grime built up on the game cart end of the connector. Replace the paper towel once it becomes too dirty or when it starts to break apart. Be careful not to let pieces of paper towel come loose inside the connector.
7. Rinse the 72-pin connector again with pure alcohol, towel dry, and then use a can of compressed air to remove any dust or lint that gets on the connector due to the towels.
8. Using a clean, very small flat head screw driver, bend each pin on the game cart end of the connector up by a milimeter. You can bend them up more, if you like, but don't get carried away, as you can damage the connector. Also, the more you bend them up, the tighter the connection will be when putting a game into the system. A milimeter of bending is all that is needed to get a nice balance between easy game insertion and removal, along with zero problems getting a game to run. Your flat head screw driver should be small enough to fit the head vertically alongside a pin, between the metal of the pin and the plastic spacer to the right hand side of the pin. Slide the screw driver's head under the pin by rotating the screw driver a very slight bit in the clockwise direction (holding the 72-pin connector in the position that it would be in when inserted in the system). The more you rotate the screw driver, the more you will be bending the pin upward. Remember, just a milimeter of bending is all that is needed. Too much will make your connector too tight.
9. Place a nice even layer of Stabilant 22 on the mother board's contacts, on both sides, and also squirt it into the cable plugs that attach to the mother board for the power/reset buttons and controller ports.
10. Reassemble the system.
11. Take a clean game cart and squirt an ample amount of Stabilant 22 on its contacts. Then place it in and out of the cart port, so as to help apply Stabilant 22 to the actual 72-pin connector.
12. Before attaching your RCA AV cables, cover the AV ports on the NES with Stabilant 22. Also cover the male part of the RCA cables with Stabilant 22, and then insert the cables into and out of the AV ports, so as to help apply Stabilant 22 inside the AV ports.
13. Regularly clean all of your game cart contacts using q-tips dipped in pure alcohol. Keep your carts in sleeves and in storage when not playing them. Try to score an official NES system cover off of Ebay, to keep dust off of your NES system when not playing it. I keep my system covered even when I am playing it. It isn't like the NES overheats or anything.
Below is the method that I use to fix my toaster NES systems. Yes, I have several. People tend to part with their toaster NES systems because they think they are broken, when all they need is some maintenance after 20 years of service. Anyway, this method is sure to make your NES as good as it was when you first got it new back in the 1980s. It takes time and patience, but if done right, you should only have to do this once every 5 to 10 years.
A few notes on the supplies that I use. First note that I do not use a replacement 72-pin connector. The unlicensed, non-Nintendo 72-pin connector replacement parts are known to be of poor quality and they are extremely tight, making game cart insertion and removal difficult. They also tend to break easily. The original 72-pin connector is the ideal choice, assuming it has been restored, which is what my method aims at: return your official connector to the perfect working condition that it was originally in when your NES was new.
The three main ingredients that I use are...
1. WD40: found in any hardware store in a spray can
2. 99% pure anhydrous isopropyl alcohol: can be ordered off of the web, it is rubbing alcohol without any water in it. It is cheap, so it is worth going through the trouble to buy a larger bottle, which should last a life time, for game maintenance at least.
3. Stabilant 22: can be ordered off of the web. It is expensive, but it is the magic ingredient for AV electronics. It is a contact enhancer used in computers, AV equipment, and even automobiles. It prevents contacts from corroding, and it also improves the electrical connection. Some people call it liquid solder.
Now for the steps on fixing your NES. Please use Google to search for details on the specifics of some of these steps, such as disabling the lockout chip, disassembling the NES, and bending the pins of the 72-pin connector.
0. Disassemble your NES and use a can of compressed air to blow the dust off of everything, and use warm water, hand dish washing soap, and a sponge to hand wash the plastic outer shell of the system. Be very careful with the stickers on the bottom half. If it isn't dirty, you can skip this. I typically just wash the top half, which tends to get real dirty. Use your kitchen sink's spray hose gun to jet rinse everything. Then towel it dry.
1. Disable the lockout chip.
2. Place the 72-pin connector in a bowl filled with WD40. One full can of WD40 should be enough. Make sure that the entire 72-pin connector is covered. Let it soak for 24 hours.
3. Meanwhile, use dampen a white paper towel with WD40 and wipe down the two metal shielding pieces, as well as the metal parts of the AV and power module on the NES mother board. Wipe in the WD40 and repeat over and over again until the components are clean and shiney. Never use too much WD40, as you don't want to get any of it on the circuit board parts. Use a clean, dry paper towel to wipe off all excess WD40 from the components you just treated. Use another paper towel, this time dampened in 99% pure anhydrous isopropyl alcohol to wipe clean the metal parts. Use enough alcohol and enough paper towels until the metal components are no longer greasy.
4. Use another paperl towel soaked in 99% pure anhydrous isopropyl alcohol and wipe the contacts on the mother board that connect to the 72-pin connector. Do NOT use WD40 on the mother board or its contacts. Repeat cleaning the contacts until no more grime comes off. You can also use q-tips dipped in the alcohol to brush clean the contacts.
5. Once the 72-pin connector is done soaking, remove it from the bowl and dry it off using paper towels. Next, pour the pure alcohol over the 72-pin connector and then dry with paper towels, repeating until all WD40 residue is removed.
6. Cover an old credit card with a layer of paper towel, trimmed to fit nicely, and moisten the paper towel with pure alcohol. Then insert it into the 72-pin connector as if it were a game cart. Repeat multiple times for both ends of the connector, until the pins are nice and clean. Use a bright light to see grime built up on the game cart end of the connector. Replace the paper towel once it becomes too dirty or when it starts to break apart. Be careful not to let pieces of paper towel come loose inside the connector.
7. Rinse the 72-pin connector again with pure alcohol, towel dry, and then use a can of compressed air to remove any dust or lint that gets on the connector due to the towels.
8. Using a clean, very small flat head screw driver, bend each pin on the game cart end of the connector up by a milimeter. You can bend them up more, if you like, but don't get carried away, as you can damage the connector. Also, the more you bend them up, the tighter the connection will be when putting a game into the system. A milimeter of bending is all that is needed to get a nice balance between easy game insertion and removal, along with zero problems getting a game to run. Your flat head screw driver should be small enough to fit the head vertically alongside a pin, between the metal of the pin and the plastic spacer to the right hand side of the pin. Slide the screw driver's head under the pin by rotating the screw driver a very slight bit in the clockwise direction (holding the 72-pin connector in the position that it would be in when inserted in the system). The more you rotate the screw driver, the more you will be bending the pin upward. Remember, just a milimeter of bending is all that is needed. Too much will make your connector too tight.
9. Place a nice even layer of Stabilant 22 on the mother board's contacts, on both sides, and also squirt it into the cable plugs that attach to the mother board for the power/reset buttons and controller ports.
10. Reassemble the system.
11. Take a clean game cart and squirt an ample amount of Stabilant 22 on its contacts. Then place it in and out of the cart port, so as to help apply Stabilant 22 to the actual 72-pin connector.
12. Before attaching your RCA AV cables, cover the AV ports on the NES with Stabilant 22. Also cover the male part of the RCA cables with Stabilant 22, and then insert the cables into and out of the AV ports, so as to help apply Stabilant 22 inside the AV ports.
13. Regularly clean all of your game cart contacts using q-tips dipped in pure alcohol. Keep your carts in sleeves and in storage when not playing them. Try to score an official NES system cover off of Ebay, to keep dust off of your NES system when not playing it. I keep my system covered even when I am playing it. It isn't like the NES overheats or anything.
SimCity SNES 8.5
This game is great and I'm a huge fan of the SimCity series. I play SimCity 4 on PC and SimCity Deluxe on iPhone.
It is so nice to be playing a simple SimCity ! No Schools, Colleges and Libraries. There is too many elements that aren't in the first SimCity to name.
A lot of the time, The older, More simple SimCity I'm much more fun and beatable. The SimCity series is deff
The only Sim game u will see on this blog !
Graphics:8
Sound:8
Gameplay:8.5
Replay Value/Game Length:9
Vs/Final:9
Overall:8.5
It is so nice to be playing a simple SimCity ! No Schools, Colleges and Libraries. There is too many elements that aren't in the first SimCity to name.
A lot of the time, The older, More simple SimCity I'm much more fun and beatable. The SimCity series is deff
The only Sim game u will see on this blog !
Graphics:8
Sound:8
Gameplay:8.5
Replay Value/Game Length:9
Vs/Final:9
Overall:8.5
Monday, 2 April 2012
Home From Game Shopping
We picked up a couple of items today.
SNES:
Gradius 3
Sim City
NES:
Gradius
Pro Wrestling
Mega Man 2 3 4
Metroid
Kid Icarus
GI Joe The Atlantis Factor
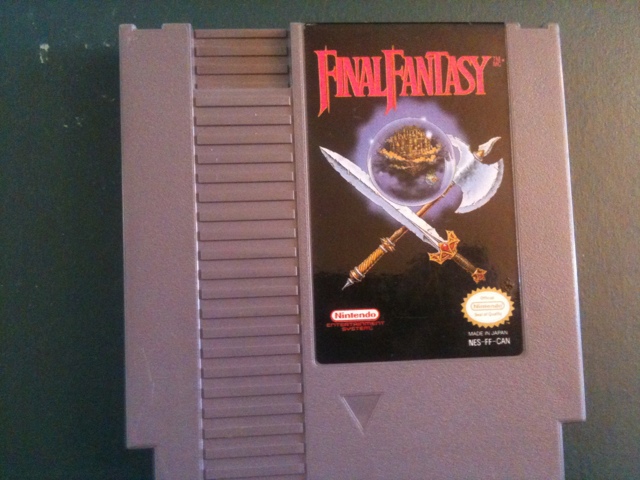
Final Fantasy
Game Genie & 10 Game Carrying Case
Someone is getting much sleep tonight, Again :(
SNES:
Gradius 3
Sim City
NES:
Gradius
Pro Wrestling
Mega Man 2 3 4
Metroid
Kid Icarus
GI Joe The Atlantis Factor
Final Fantasy
Game Genie & 10 Game Carrying Case
Someone is getting much sleep tonight, Again :(
Subscribe to:
Posts (Atom)